
When you run a print farm at scale, you quickly find that the fundamental metric that determines your success is uptime. Uptime is determined both by incoming demand, as well as printer upkeep, maintenance, and tuning. If printers aren’t maintained well, you’ll find prints being to fail for various reasons, all of which can be prevented with a bit of forethought in design, and some occasional manual adjustment, you’ll find that you can make an Ender 3 Pro work reliably every time.
TLDR: Download all the files from the 3D Print Pittsburgh Ender 3 file repository, print them out (preferably in a fiber filled filament like Polymaker PA6-CF), and install them on your Ender 3 / Ender 3 Pro. Trust me, you’ll thank yourself for taking the time to do this:
https://files.3dprintpgh.com/s/T2qxxyJmKfHfK6Q
So what exactly goes in to making the Ender 3 Pro a perfect base printer?
Out of the box, the Ender 3 pro is a very basic, entry level printer with some minor upgrades and enhancements for when it came out. It’s well documented and very popular, meaning you can find tutorials and parts all over the internet. There’s also a ton of printable upgrades for them on sites like Thangs and Thingiverse. All of these things make it a great platform to build on in order to customize it to your exact needs.
It comes with a bowden extrusion system, very basic tensioning system for the belts, and in most cases, a basic main board with noisy stepper drivers that results in some pretty loud operation, especially if you’re trying to run it in your house in an office or what have you. There’s no auto leveling, and it has a rubbery build surface with a max temperature somewhere around 250 – 260 (tested first hand, I do not recommend!) Still, it does come with an upgraded power supply and heated bed. Really, it’s a perfect lightweight printer to use as a base for expanding into a high power machine on a budget. After tinkering with the platform for years now, we’ve managed to refine a couple of “must have” upgrades for the Ender 3 Pros, as well as a couple of highly recommended ones.
A better hot end
The biggest thing that tends to hold back consistently successful prints on the Ender is the stock hot end. Most people with extensive experience with the Creality hot end that comes with the CR10, Ender 3, and Ender 5 can attest to the fact that unless you get the cut on your Bowden tube just right, you’re asking for issues with clogs, leaks, and general quality. Sometimes you’ll have a great print and the very next one you try to run ends up messing up the whole printer, resulting in you having to tear down the hot end to clear the clog. There are a number of things we can do to help with this issue.
First and foremost, we upgrade all of our printers to a bimetal heat break, and a high temperature thermistor that can handle temps up to 300c. The bimetal heatbreak provides a nice flat surface for nozzles to rest against, ensuring a nice clean contact point every time. No more issues with cutting Bowden tube straight, because the Bowden tube stops much higher up in these heat breaks, way above where molten filament is. The high temperature thermistor is both more heavy duty, and is also needed if you want to take full advantage of the “all metal” features of your newly installed bimetal heatbreak. The thermistors that come on the Ender 3 are coated in a PTFE coating, so they have a similar maximum temperature rating to the Bowden tube used by default. By replacing it with an upgraded, high temperature thermistor, you’ll be able to print a number of new filaments including polycarbonate and nylon blends. Even if you don’t plan to print these higher temperature filaments, this upgrade is still a very valuable one if you happen to encounter leaking, clogging, or under extrusion issues.
On top of the purchased hot end upgrades, you’ll also find a number of files in the linked file pack that help to fundamentally redesign your hot end layout. For starters, you’ll find a new hot end part cooling fan mount that actually enables you to optionally mount two part cooling fans for better bridging. This part cooling fan is paired with the included hot end fan duct to create a full hot end cooling system that replaces the factory box which covers the extruder. The factory box works alright, but it does allow a high amount of air to flow out the bottom directly towards your print. Even if you have your part cooling fans off, the hot end fan can’t be turned off, and you’ll find that the cool air flowing downwards has a severe effect on bed adhesion. By replacing the factory box with these two parts, you ensure that the air from the hot end fan is properly directed and does not blast downward onto the bed. It also allows easier access to the heater block itself, making nozzle changes a breeze. No need to take off and balance the hot end housing anymore just to swap the nozzle, everything is accessible while mounted. You can even fit pliers in to hold the heater block while you loosen the nozzle.
BONUS POINTS: If after conversion to an all metal hot end, you decide you want to start playing with higher temperature filaments, that’s great! You’ll quickly find that the factory silicone socks can’t stand up to much higher than 260 degrees Celsius or so, and also that you greatly benefit from having a silicone sock at these higher temperatures for achieving accurate PID tuning. It’s worth investing a bit in some high end silicone socks made just for this purpose. Gulfcoast Robotics has some great socks we’ve been using on all of our printers recently:
Glass print surface (optional)
The included rubberized surface actually works pretty great, but for PETG it can sometimes cause warp, and on higher temp filaments your nozzle is actually liable to melt it. I’ve found that the best way to ensure a perfect print every time is to print on glass with a layer of Layerneer Bed Weld in order to keep things really stuck. As an added bonus, the bed weld actually releases when it cools off, making your prints pop right off the bed with ease. If you plan on printing higher temp filament, or if you just want to make sure you don’t end up with any warp in your prints, I definitely recommend both of these things.
Automatic bed leveling
My friend Evan told me for months that I should really just try out auto bed leveling on my Ender 3 Pro, but I could never be bother for the price of BL Touch. I figure my manual leveling working fine enough for my needs. Well, after taking the jump and trying out and auto bed leveling (ABL) sensor on my Ender, I’m never turning back. The ease of leveling and resulting accuracy in your first layer means significantly less print issues and failures. This is the final piece of the bed adhesion trifecta that really makes it so that you can get perfect adhesion, reliably, every single time.
Also, there are plenty of options for bed leveling, but personally I’ve found the $15 3D Touch on Amazon to work perfectly. It’s a low cost BL Touch clone, but at less than half the cost, I must say I’ve been very impressed with the performance!
Running in the house? Don’t forget a silent board!
The factory stepper drivers on the Ender 3 Pro aren’t notoriously very quiet, up to the point that Creality actually created and sells an aftermarket main board with what they call their “silent” drivers. This board is MUCH quieter, and if you’re running the printer out of your home office instead of the basement or garage, it can definitely come in handy to keep the printer noise down. We install these boards on all of the printers in our farm, and we also flash them with TH3D firmware in order to set up BL Touch and custom printer identifiers. You can snag these silent boards for around $50 and for keeping the noise down, they’re definitely worth it!
Get tighter tolerances and better extrusion with direct drive
There are two common types of FFF extrusion systems currently in use, Bowden style extrusion, and direct drive. The Ender 3 Pro is a bowden style extrusion system by default. In a bowden system, the extruder motor (the motor that’s responsible for pushing filament into your hot end) is mounted to the frame of the printer, and a long piece of “bowden tube” is used to connect it to your actual hot end. You feed your filament in to the extruder motor, through the long piece of bowden tube, and it comes out of the hot end. This system has certain small advantages, but its downfalls are enough to outweigh those advantages.
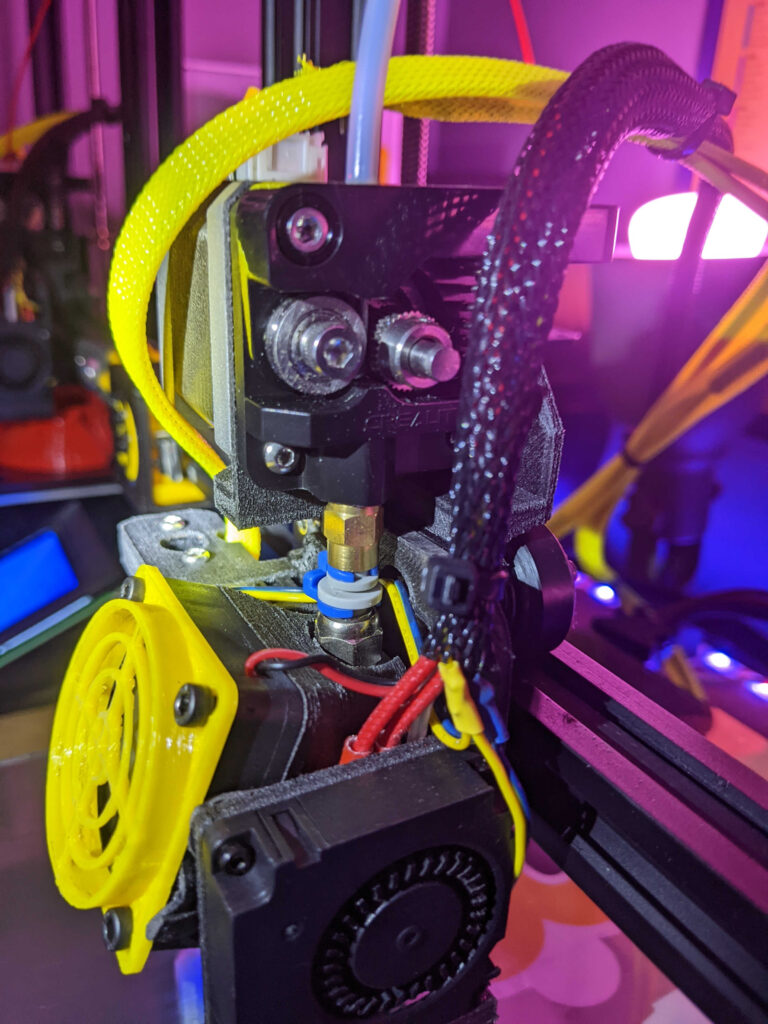
Contrary to this, a direct drive system works by mounting the extruder motor directly to the top of the extruder. These two pieces are then connect with a very short piece of bowden tube, much shorter than used in a traditional bowden setup. By putting the extruder motor directly on the hot end, you get much more precise control over the actual deposition of your filament. It really helps to cut down oozing and give you much cleaner, sharper prints.
Luckily, converting the Ender 3 Pro over to a direct drive extrusion system is actually not very hard at all! You don’t need to purchase any additional parts, and can simply print a single piece to enable you to switch straight to direct drive. The part is included in the parts download list in this post. You just print off the direct drive mount, remove the extruder motor from your Ender, remove the hot end carriage, and mount the extruder to the hot end carriage using your newly printed bracket. Once it’s mounted up, simply slide the carriage back on the printer and you’re ready to test things out! You’ll want to connect the extruder motor down to your hot end with a short piece of bowden tube. Don’t worry if you don’t get the length right at first, it can take a few tries to get used to at first, but the resulting conversion is definitely worth the time and effort!
Improve layer precision with better belt tensioners
The Ender 3 Pro comes with some admittedly bad belt tensioners out of the box. They’re just basic pulleys attached to some metal brackets, and you have to use leverage from the included wrenches to try to get them tight. More often than not, this can be a weird and difficult balancing act, and it’s easier to simply replace the tensioners with better ones that you can make right on your printer! In the included file pack, you’ll find new tensioners for both the X and Y axes that work with thumb screw knobs that you can simply turn by hand to tighten. These tensioners give you a much easier way to make sure your belts are nice and tight, and that you aren’t introducing any unnecessary slop into your prints.
That’s it! Enjoy your new and improved Ender 3 Pro
With these basic upgrades, your Ender 3 Pro will print MUCH better than it ever did out of the box. These few changes fix 99% of the common issues we’ve seen on the Ender 3 Pro. This list is also the comprehensive base list we use when setting up a new printer for our farm. Now, there are many different places to go from here, including upgrading your Ender’s build size with the popular Ender Extender kit, or even giving yourself the ability to print multiple materials at once with an Ender IDEX kit, but this is definitely a topic for a future blog post. In this post, we aimed to outline all of the upgrades necessary to get a good, reliable base printer up and running on a budget, but definitely keep an eye out for future posts on some of the cool and useful upgrades and improvements you can make on your Ender 3 Pro!